Posted in Au Pair Anecdote

Anecdote of a Filipino Au Pair (2)

Adjustment Period

Kansas, USA. A state, a country and a culture that’s all foreign to me. Before deciding to register with GAP I answered the questions that a couple of people asks me:

(1) Can I do it? I know I can and I believe I can.

(2) Are you willing to give up your professional career? Yes.

(3) Will you be ok being called a nanny rather than a nurse/teacher? I had a strong yes on this when I was in The Philippines. However coming here, when people started to look at you differently because your JUST a nanny made me feel small and insignificant. Soon enough though, I met people that didn’t mind what I was doing, they liked me as a person. I’d be honest that it still bothers me when people look at you like you’re a lower class person because you take care of other people’s child and live with them. I learned to just shrug my shoulder about it.

(4) Can you do what I do? Your the only one who can answer this question.

(5) Can you live with someone you don’t know? I’ve been living alone since I attended college and this is a tough question for me. Remember to ask your host parents about house setting so you can better prepare yourself. In my case, my host parents live in a Golf course property house with a wonderful basement. My room is in the basement next to the guest room. The lower level has it’s own Kitchen (fridge, dishwasher, coffee maker, microwave, stove, etc.), entertainment showcase (cable TV, Wii, PS2, lazy boy), golf course view or more like a backyard and personal bathroom. Somehow, I’d say I’m still living alone — which I like.

Andy (I’ll call other Au Pairs with pseudo names. Lol) is also an Au Pair under GAP from Ukraine, her house setting is different from mine because their house is one-story, her room is next to the 4 kids room so she complains about the kids going to her room even on her day off and she shares everything with the family.

I’ve only been here roughly four months and I’d say I am passed the adjustment period. I am happy with my host family and the situation I am currently in. Sure, money is very small especially when you start going out and doing your own thing. Overall, the money should still be enough to meet your need, I mean the host family is paying for the house, food and bills (even gas in my case). I believe life as an Au Pair can be fun and meaningful depending on how you set your mind.

*I’ll tell you more about 3 Au Pairs with GAP in KS in other post and their experiences so far.


Posted in Au Pair Anecdote

Anecdote of a Filipino Au Pair (1)

I received a couple of e-mails asking How I was doing as an Au Pair in US, How my life is moving to a foreign country living with people I don’t know, How I was able to give up my professional career for a role of ‘just’ a Nanny, and If they can do what I do.

For starter I appreciate the messages.

Part 1

I flew to USA on the 18th of April with three transfers or connecting flights. First stop Shanghai, then Chicago and finally Missouri. I worked in a Call Center industry so the American Culture at the Airport didn’t surprise me that much. Please don’t think of it in a negative way,  I’m talking about the casual talk and greetings.

When I registered with GAP I tried to make everything as specific as I can (like the number of kids I can take care of and the type of host family). My application clearly states that I can only take care 2 kids at the same time, sure, this probably made less ‘match family’ than agreeing to take care of more kids. But I know in the long run, I’ll be happier and will do my job better. The second thing is that I was looking for a family with either a Filipino Mom or Dad. Of course, the search was hard and I didn’t find a host family that was interested with my specific requests. God is watching me though, my host mom found my information and everything went fast.

Each Au Pair will have their own experience and mine is awesome (so far). Let me just say this, I believe I was matched with the perfect family because we were both honest during our Skype talk. I’m naturally an open person, so when they asked about certain stuff I gave them a transparent response and they did the same thing.

I’ve only been in US for four months and I’ve seen Lake Tahoe, Reno, Missuori, Omaha and NYC. My host parents/family are good natured and fun! We do the touristy stuff together like a family. Of course, once in a while I still feel like I’m an outsider and that I’m tired of watching someone else’s kids. When this thougths come to my mind I pray and ask for guidance because if you think that you’re an outsider, you WILL be an outsider. It’s all about mindset, sure I get tired and ran out of patience with the kids but don’t let it poison you. I love the kids I’m watching and the family that took me into their home.

Okay, back to my anecdote. Lol. As a rule, an Au Pair should be with at least 1 parent while watching the kids for the first 3 days.

Day 1 – Kids was in Daycare. My host dad showed me Kansas City Missouri/Downtown with all the touristy stuff.

Day 2 – Host Mom thought me about the kids basics (food, diaper change, activity, etc)

Day 3 – Day off (yep).

Day 4 – Drop Kids off daycare then head to SSS office for my Social Security Number.

Day 5 Onwards – Watch the kids, look for classes to enroll in and open a bank account.

Au Pair Program requires you to take classes with 6 credit hours/units. I wanted to get this requirement done the soonest so I enrolled for summer classess. This is my excuse for being ‘busy’ apart from watching the kids and travels. Hahaha.

May to July – Summer Classes. Paramedic Class. Grade: A 😀

August – Trip to Lake Tahoe, Reno, Lake of the Ozark, and Omaha.

September – NYC baby! and KS Drivers License wohooo!

That’s pretty much what happened in the last 4 months. Nothing too big, but next anecdotes should be more interesting since I started driving more, know other Au Pairs & their stories, meeting friends, going out, party and dating 🙂


Posted in Au Pair Process

Simplified guide to be an Au Pair in USA

I like sharing things and I like making things easier, if not for me, at least the others who might be doing the same thing I do. This is a guide on how to make your J-1/Au Pair Visa application easier, cheaper and more efficient. Please note that this is specifically what I did, may vary when you apply sine things may change.

As soon as you decide to be an Au Pair, I suggest you prepare the money you’ll be needing because it happens really fast.

  1. Register in an Au Pair Designated Sponsor Organization.
  2. Make sure to list or register yourself as J-1 (they usually have other option) and complete the Au Pair Training (usually free of charge).
  3. Find a kind and loving host family. You’ll be interviewed by the family then the organization.
  4. At the same time, Authenticate the following Documents: College AND High School TOR including Diploma, Birth Certificate, CENOMAR and a complete medical check-up (the Agency usually provides a medical form to use or as a guide).
  5. Make sure you have a valid Driver’s License (you’re required to have an International Driver’s Permit***Link to how to get AAP**.
  6. Wait for the confirmation e-mail that says you have a Host Family Match.
  7. Follow the instructions in the e-mail. This is the part where they usually refer you to a Philippine-based agency to re-verify your documents. This is also the part where you’ll have to [pay the local agency]**SSAYEI feedback** to be able to move forward with the application.
  8. Schedule an appointment with US Embassy **Link to Visa Application instructions**
  9. As soon as you receive the Visa from Embassy notify your Agency. Trust me, after this, you’ll cram because it happens like a blink of an eye.


*Note: Please be sure that your Passport is valid for at least 2 years from the time you applied. Just to play safe.

Posted in Au Pair Process

How to be an Au Pair in USA

Everyone has a dream country or a place he/she wish to visit. For most Filipinos, USA is a land of dreams… the Visa though. Applying for a tourist visa can be costly and theirs a higher risk of not getting approved, unless you have a really nice asset(s) in our home country. I’m happy to share what I did to get into the United States with no Visa problem and a single question from the Immigration Officer.

Basically an Au pair is a type of domestic assistant working for, and living as part of, a host family. Typically, Au Pairs take on a share of the family’s responsibility for childcare as well as some housework, and receive a monetary allowance for personal use. To make it sound or readable better, The title comes from the French term au pair, meaning “at par” or “equal to”, indicating that the relationship is intended to be one of equals: the au pair is intended to become a member of the family.

To qualify for the Program here are the requirements:

  • Proficient in spoken English;
  • A secondary school graduate or equivalent; and
  • Between 18-and-26-years-old.
  • Capable of fully participating in the program as evidenced by the satisfactory completion of a physical.
  • Personally interviewed, in English, by an organizational representative who shall prepare a report of the interview which shall be provided to the host family; and
  • Successful in passing a background investigation that includes verification of school, three, non-family related personal and employment references, a criminal background check or its recognized equivalent and a personality profile. Such personality profile will be based upon a psychometric test designed to measure differences in characteristics among applicants against those characteristics considered most important to successfully participate in the au pair program.
  • Disclaimer: This requirement info has directly been copied from the best source: The US J-1 Visa Website. Please be reminded that, this is only the Gov’t requirement, each agency may have additional requirements.
  • Additional Requirement by Agency: Driver’s License

I’ll try to make this elementary as possible. And again, this is how I did it.

  1. Register with GreatAuPair.com then click on the tab J-1 Au Pairs.
  2. Fill out the form, submit scanned copy of docs and complete their online training.
  3. Look for a host family. (This is supposed to be the job of the Local Agency, that is if you want to give them commission — In my case NO)
  4. Start processing required/authenticated docs.
  5. After completing the requirements they will refer you to visit a local agency (in a different post). Please note that the Philippine government encourage us NOT to use any local Agency and apply directly, the thing is GAP referred me to them. I asked them why I have to coordinate with a local agency and I have to pay them –they diverted the topic which means they can’t answer it.
  6. Visit local agency and submit requirements, yes, again.
  7. Pay the fees and schedule a Visa Interview. (Visa application should be done by the Local Agency but I did it instead. Read my other post)
  8. Visa Interview Day at US Embassy. I was only asked one thing: “where are you going?” (Please note that you should respond with the City and State where you’ll be going and NOT ‘USA’. Lol; Other possible questions – What does your Host family do? How many kids? How old? What will you be doing there? For How long? How much is your Salary? Will you be attending school?)
  9. Receive/pick up Visa/Passport after a week.
  10. As soon as you receive your Visa, schedule an appointment with CFO.
  11. Attend CFO orientation.
  12. Get Ready to Fly!


TIP: Do not bring anything that might cause you not to be admitted in the Country. I followed all tips the CFO office gave me.


Oops. I’m Sleepy now. I’ll add more in the future. Thanks for reading!

*Disclaimer: All information in this blog is solely based on what I have gathered and personally experienced.

Posted in Au Pair Process

The expense of applying for J1/Au Pair Visa

Okay, I know I previously wrote how costly it can be when applying for a tourist visa to USA but I didn’t know it will also be THIS expensive to get the Au Pair visa. Initially, I thought I would only be paying for the fees in having my documents Authenticated (budget php 1000) and the Visa Application fee (php 8000), I was hell wrong. I will try my best to enumerate all the money I spent for the J-1 Visa.

Things to note:

  • Home: Cubao, Quezon City
  • DFA Office in Ali Mall (**Feedback hyperlink**)
  • NSO in East Ave. (**feedback**)
  • Medical Exam in Sparks Place Cubao
  • Local Agency in Makati (**SSYEI feedback hyperlink**)
  • US Embassy in Manila (**visa application instruction hyperlink)
  • Currency in Philippine Peso and Prices as of 2016, otherwise specified


March 15, 2016 – Day 1 : Process Required Docs

– Jeep to NSO (East Ave.): 7.00

– NSO Doc Fee: 335.00 (Birth Cert – 140; Cenomar – 195)

– Jeep going home: 7.00

March 16, 2016 – Day 2 : Process Required Docs

– Jeep to EDSA: 7.00

– Bus to Valenzuela: 28.00

– College TOR: 150.00 (Note: HS TOR is Required but I wanted to bring my College records too)

– Bus back to Cubao: 30.00

– Jeep going home: 7.00

March 17, 2016 – Day 3 : Process Required Docs

– Ask Mom to request for HS TOR and Diploma verified by DFA.

– Note: My HS is back in the province of Leyte which was destroyed by Typhoon Haiyan.

– Mom needs to visit CHED office for Region 8 – she did on this day but Director is not around.

– It took 2 weeks before my mother was able to get a hold of the very “Busy”Regional Director. Got him signed the Docs.

– Once verified by Regional CHED office, it has to be verified by DFA, in Manila.

– Total Cost: 1110.00 (Doc Sent to Province – 180; Sent back to MNL – 180; Stamp/Signature from Ched – 250; Ched Snack – 500 [to get my papers moving])

March 18, 2016 – Day 4 : Process Required Docs

– Medical Check Up – Free (because the company I worked for had an Annual Check up)

– Med Cert – 350.00 (for the results, signature, etc.)

—— Waiting Game …… 2-3 weeks later ——-

April 6, 2016 – Day 5 : Process Required Docs

– Jeep to NSO: 7.00

– Receive NSO and Cenomar

– Jeep to EDSA: 7.00

– Bus to Valenzuela: 23.00

– Collect TOR

April 7, 2016 – Day 6 : Process Required Docs

– Jeep to DFA: 7.00

– DFA CAV fee: 800.00 [TOR, Birth Cert, Cenomar] (200.00/doc for Rush after a day; 100.00/doc for Regular after 1 weeks)

– Bus to Magallanes (Heading to Local Agency): 30.00

– Jeep to City Land, Makati: 7.00

– Submit Photocopy/unauthenticated Docs (Local Agency Feedback in different Post)

– Jeep going back to Cubao: 35.00

– Tricycle going home: 25.00

April 11, 2016 – Day 7 : Process Required Docs

– Jeep to EDSA: 7.00

– Bus to Magallanes: 30.00

– Jeep to Makati: 7.00

– Show the Office your Authenticated Copy of Docs (Note: YOU keep the CAV)

– The Local Agency will now provide you the Banking details and the Fees you have to Pay

– Jeep to EDSA: 7.00

– Bus to Cubao: 35.00

– Tricycle going Home: 25.00

April 12, 2016 – Day 8 : (Real) Application Process Start

– Jeep to Farmer’s Cubao/RCBC: 7.00

– Deposit Local Agency/Program Fee: USD 1,200 (php 58,400 – Tip: Request a copy of deposit slip from the Bank)

– Bus to Magallanes: 30.00

– Jeep to Makati: 7.00

– Submit a copy of Program Fee Deposit Slip; Then they’ll give you another instruction to pay for the VISA Application Fee (you can get this by yourself online)

– Jeep to EDSA: 7.00

– Bus to Cubao: 35.00

– Tric Home: 25.00

April 14, 2016 – Day 8 : (Real) Application Process Start

– Tric to BPI: 25.00 (Note: US Visa Application  can only be paid in BPI, bring the receipt number or the piece of paper the Agency gave you because the bank and you will need it)

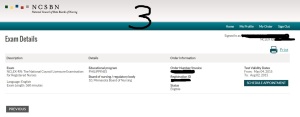
– Deposit Visa Application fee: 7,860 (TIP: Pay this before 10am so you can schedule an Appointment 4 hour after. Do not repeat my mistake, I deposited after Lunch and I had to wait until 4pm the following day to schedule an appointment. Every minute counts since a lot of people is applying for a visa).

– Tric going home: 25.00

April 19, 2016 – Day 9 : (Real) Application Process Start

– I was lucky to get the single available spot just a couple of days after I paid.

– Uber going to US Embassy: 280.00 (Don’t stress yourself with traffic, you have to look pleasant in front of the Consular Officer)

– Interview Info in diff post.

– FX going to EDSA: 35.00

– Bus to Cubao: 25.00

– Tric going Home: 25.00

May 13, 2016 – Day 9 : CFO Orientation

– FX to Buendia: 50.00

– Taxi Buendia to CFO Office: 70.00

– CFO Fee: 450.00

– Pedecab Back to Buendia: 50.00

– FX back to Cubao: 50.00

– Tric going Home: 25.00


—– After two months of processing and 3 weeks after getting approved —-

May 18, 2016 – Flight Date to USA

– Uber to Airport: 305

– Travel Tax: 1,650

Total: 72,519.00

> Is this cash-out worth it? Follow my future blog on my experience.

Disclaimer: The total does not include the photocopy fees, snacks and waters I purchased. I’m a thrifty person so I bring food/water whenever I can.

**Please note that I am still working with other post/links and I’ll try to update the soonest.


Posted in Commuting, Uncategorized

Bukal Falls + Liliw Church


DSC_3563.JPG

Bukal Falls, Majayjay, Laguna — Philippines

Itinerary:

0600: ETD HM Bus Terminal Cubao

-Fare: php 140

-Cubao to Sta. Cruz Laguna

0900: ETA HM Bus Terminal Sta. Cruz

-From Bus Terminal cross the street and Ride a Jeep to Liliw

-Fare: php 30

0930: Attend Mass at St. John the Baptist Parish Church (Filipino: Simbahan ng Parokya ng San Juan Bautista), also known as Liliw Church or Lilio Church

-After the mass you can go around the Church area for Slippers Shopping or Food Trip

-Take Tricycle to Brgy. Bukal Office

-Tric Fare: php 200/tric (max 4 people)

1130: Brgy. Bukal / Registration Area

-Reg Fee: php 20

-Guide Fee: php 300 (that time its Optional and not really necessary for me)

-Theirs only one way going to the falls from the Brgy. Hall, which is why a guide is not necessary for me, especially if your a budget traveler.

-The road going to the falls are mostly paved and it’s an easy 30-45 minute walk.

-Camping is aloud however camping site is very limited.

1210: Lower Area of the falls. Lunch.

-Our guide told us no eating is allowed near the falls.

1235: Hello refreshing Bukal Falls!

DSC_3551-01

0400: Start Descent

-Our guide asked us if we wanted to take a ‘shorter’ traverse route going back, however we will be going out in a different Brgy.

-NOT a shorter route, it took us a good 1hr and 15min……. and passing in a different Brgy. we had to pay another 100 (for group of 6).

-The view was wonderful though.

0515: Wash Up Time! (in some random persons house, the guide told us we can use the bathrooms — and we did. LOL)

0600: Sun is still high up. Tricycle hunting mode going back to Liliw proper.

-Fare: php 200/tric (group of 6 + konsehal)

0630: Liliw Proper – Dinner

0700: Catch a Jeep to Sta. Cruz

-Fare: php 30

-Liliw to Sta. Cruz Bus Station

-Note: Jeepney’s hard to come by so if it does, find a way to fit yourself in or top load baby!

-Note: Most Bus Company’s last trip STC to MNL is 7PM (we were lucky to catch the LAST and ONLY Bus going to MNL, Buendia though not Cubao, still I’m going home)

1030: Magallanes MRT Station

-To take a bus going to Cubao.


Personal Note. Personal Opinion, Personal Observation:

People are nice however they seem to be very used to tourists and try to rip them off.

Scenario 1: From bus terminal you have to take a jeepney going to Liliw. A jeepney passing by with a signage “Magdalena” (note the jeepney route on the side is Sta. Cruz – Liliw) stopped in front of us. Before riding the we asked the driver and the barker if it will pass by St. John the Baptist Parish Church or Liliw Church — they both said yes.

We asked the driver how much the fare would be and said php16, after about 10 minutes he stopped and pointed to a church. “Ayun na po ang Simbahan Ma’am”. Thinking that it was the church we intended to visit we alight and walked for about 2 minutes — then I realized it’s not the place I intend to see. Still a very good place to pray and also very old like St. John the Baptist Parish Church, it was The Santa Maria Magdalena Parish Church (also Saint Mary Magdalene ParishChurch).

Though not as planned, I couldn’t complain because its worth the visit and misadventure.

Scenario 2: Jeepneys hardly come and if they do, it’s full. So, we hired a tricycle instead. The driver charged us php300 Magdalena Church to Liliw Church. Considering the distance, the 300 was fair. (I don’t think this is a rip off)

I couldn’t find an itinerary like ours (Liliw Church – Bukal Falls) so we weren’t sure if we can walk going to Brgy. Bukal’s brgy hall, so we asked the locals. We meet a local ‘konsehal’ and offered to guide us — I had a bad feeling about it so I immediately asked How much it would cost if he guides us, his response was “E konsehal naman ako dito ay wala nang bayad iyon, sasamahan ko nalang kayo” (I’m a local councilor so you don’t have to pay me). Then we hired another tricycle Liliw Church to Brgy. Bukal php 200 per tric and they only allow max of 4 pax each because the road is ascending.

When we reached Brgy. Bukal registration area, paid our dues and were provided (another) local guide (because ‘konsehal’ is not an officer of Brgy. Bukal and thus unknown to Brgy. Bukal officials). One of us said “Edi dalawa na yung guide namin?” (Now, we have 2 guides?) [This again is very unnecessary]. That time I told ‘konsehal’ he doesn’t have to come with us anymore since they have provided us with a guide, telling him we didn’t want to cause anymore inconvenience for his time — which he responded with “ay okay lang iyan wala naman problema iyon sa akin, samahan ko pa din kayo” (No, it’s okay. It’s not a problem. I’ll come with you).

Long story short: By the end of the day we paid for his Dinner (which was fine) and asked for a compensation (“in whatever amount we feel like”). We paid 100 each .

With this experience I realized that PEOPLE ARE NICE TO YOU BECAUSE THEY NEED SOMETHING FROM YOU.


In whatever scenario I will visit Bukal Falls again, next time with my camping gear 🙂


Posted in Uncategorized

Liacom & Bellsoft

Okay, these two has recently been popular and people are confused whether they are a Recruitment firm or a BPO company.

  1. They claim to be ‘direct hire’ connected to different companies to hire people and not a recruitment firm.
  2. Like Google? If you look at their individual websites Liacom Offshore Outsourcing and Bellsoft Global Contact Solutions you will be convinced they’re a legit BPO company. I did my research for this two.

To end the disarray I went, visit and tried their ‘hiring’ process. As I thought and everyone their was utterly confused — they are a RECRUITMENT firm. In what ever way they sugarcoat their business such as “We are an in-house company who provides man power to companies in need based on your profile, instead of you going directly to the company applying for a position and only to find out the position you are applying for is not open we look for a company that would fit your goals” this was his (the guy who did my first interview) words. I wasn’t convinced to what he told me when I ask if they’re a recruitment firm so I asked (seeing a Bellsoft flier on his desk) what Bellsoft is instead, “Bellsoft is actually our sister company, we recruit people and endorse them to different companies” ———– Their we go folks, he said it himself.


Note: I applied online for both companies and scheduled my visit for Liacom Thursday and Bellsoft Friday – thus I knew Bellsoft exist.

DSC_3483

Posted in Uncategorized

NCLEX DIY STYLE PART 2

Okay, I received my ATT months ago but  was only able to update this blog due to review schedule and all. Anyway, now, I can say that I have the right to share how I applied for NCLEX Exam DIY, with confidence (meaning I  did the right steps) ;p

Again, I applied for state of Minnesota.

1. Apply for CGFNS CES, once cleared and they have confirmed that the documents were sent to BON.

(Note: Every document they received from you will have a corresponding email response with the subject: CGFNS International Document Receipt and the last email I received from them is marked as #1 in pictures below)

(TIP: Send the documents from your school with the school address as a return to address even if your the one sending it to CGFNS. Note, they do NOT accept documents coming from students: IELTS result, TOR and PRC docs.

Confusing? To clarify my school gave me my TOR and all other papers that CGFNS requested from my school to be sent to them–which the school is suppose to send. But in our country or at least in my school they gave that responsibility to me, thus and technically I WILL be the one to send the documents to CGFNS. I made a grave mistake in putting MY address as a return to address (instead of the school) which they rejected and made the process longer and more expensive (another 1,500php mail fee).

Length of time:3-4 months (not counting the error I made with the ‘return to address’)

CGFNS 1

2. Register and Pay for the $200 fee at Pearsonvue.com

(Note: On the website after registration you will see START THE REGISTRATION PROCESS – do it)

Length of time: Real Time (for registration) and within 24hrs for payment receipt.

CGFNS 2

3. ATT. (Yes, the long awaited ATT is finally here)

(Note: After registration and payment confirmation from pearsonvue I received my ATT sent by MN BON via email within 24hrs)

CGFNS 3

4. Your PEARSONVUE account will have something that looks like pic #2 (see below). Just click on the blue hyperlink:NCLEX-RN: The National Council Licensure Examination for Registered Nurses for scheduling, exam location and another $150 payment.

(After clicking on the hyperlink it should be directed to pic #3-4)

(ATT Validity depend on the state you are applying to and you will also see it in your account and on the pics posted)

Length of time: Real time.

CGFNS 4

5. Quick Result. The quick result option will only be enabled once the result is available  (duh.Lol) which means 2 days after the exam (but for PH time its after 3 days). And you have to pay around USD 8.

(See Pic#5)

Pass

Congratulations, you have passed the NCLEX!

*Next I will post: FAQs. Which most has been answered on this and previous post. 🙂

Posted in Philippine Documents

NCLEX DIY Style Part 1

As of the moment Nursing, or should I say Bachelor of Science in Nursing is the top choice for High School Students going to college (specially the one’s who wants to migrate elsewhere). For some reason the vocation, a calling to serve others became a job, a business or sometimes a ‘racket’. Don’t get me wrong, I have nothing against it, we all, are working hard and doing our best not just for ourselves but for our family (knowing the Filipino culture, LOL).

Anyway, I am currently processing my NCLEX application, on my own. I and my mom worked hard for the money I (we’re) using for my application, thus applying thru an Agency will surely cost me (us) twice the amount I would spend if I’d do it myself.

Disclaimer: EVERY step and process on this blog is solely from my experience/opinion.

Note: I am applying for the state of Minnesota. I believe process would be more or less the same with other states but with different requirements.

Three things I’d say you have to have first before applying for NCLEX:

(1) Knowledge on the process/requirements – I Google every possible information I would need.

(2) Patience – Google is very helpful, but it is also not helpful. With all the information posted online and elsewhere, sometimes, instead of helping they’d confuse me. I suggest use and believe only the credible sites/blog.

(3) Money/Credit Card – I paid for my CGFNS CES fee using CC for $300 USD (I just checked CGFNS website and now it says $350) FYI: IELTS – Not yet necessary to be able to take the NCLEX, why you say? See picture below.

CGFNS – (1) A type of Exam required in some states before being allowed to take the NCLEX. (2) Is NOT an examination (in my case), they’re just the ones that verify your documents, as “real and not tampered”. As their website says: The CGFNS International CES Professional Report provides a detailed analysis of the credentials earned at multiple levels of nursing education received outside the United States according to requirements specific to a state. Nurses use this service for licensure, immigration, and employment purposes. (No copyright intended)

CFGNS Registration- Choose the service: Credentials Evaluation Service Professional Report Application (CES Report) [ CES Professional report is for RN’s in PH if your not a RN but graduated with BSN Degree, you may choose Credentials Evaluation Service (CES) Academic Report ] CGFNS Website: http://www.cgfns.org/services/ces-professional-report/#step1 or this https://www.cgfns.org/cerpassweb/login.jsp  (The Link should bring you to registration)

Advice for DYI doers like me?

1. PRAY. A lot.

2. Make sure every form you fill out are filled with correct information. No back button, as far as I remember.

3. Read and comprehend the steps, requirement, etc. To save time and money. (I’ll tell you why in the next post)

4. Don’t rush. Too much.

5. Always be grateful for all and every help you get (specially the unexpected).

*** I just got off work so I am pretty tired. I will be posting other steps I have in the next days or in a week.

*** God Bless Nurses 🙂

Continue reading “NCLEX DIY Style Part 1”

Posted in Uncategorized

French Class

Interested in learning French? I know two schools/institute that specially offers the Language. First, DEL Extramural Language Courses (UP Diliman) and second, Alliance Française de Manille. For schedules and Fees, just Google the names of both institute and you should get their website as a result. This post is not intended to provide you with their information because they always, well, probably not always but most of the time they change class schedules, fees and professors availability.

Commuting is part of my/our daily lives, so this post is to guide you on ways to get to both schools. This is specially for Alliance because everyone knows where UP is. And this is the easiest and cheapest way I know.

(1) DEL Extramural Language Courses (UP Diliman)

Add:Department of European Languages, College of Arts and Letters, University of the Philippines Diliman, 1101 Quezon City, Philippines

Good to Know:

French, German, Italian, Portuguese, Russian and Spanish language and culture courses

Commuting:

– Coming from EDSA (anywhere in EDSA)

– Ride A BUS going to FAIRVIEW

-Descend at PHILCOA (bus will stop under an underpass and that’s were Jeepney’s will be)

– Take a Jeep that has UP IKOT or UP CAMPUS sign. See Picture # 1.

– Go down on the 2nd stop (waiting shed). (The moment you see the UP Monument the jeep will turn right and then left, 1st stop/1st waiting shed, a little further will be the 2nd stop/second waiting shed)

– The building right in front of the second waiting shed is the College of Arts and Letters Building.

– For New Enrolle-es: Paying the tuition fee will be at the cashier, different building from CAL. Just ride the Jeep with UP IKOT sign again and descend at “Shopping Center”, from the side you will be off go straight on your right side, shopping center is on your right too. On Picture #2, facing picture #2 you go left. LOL. Follow the arrow sign on the pic. Going back to CAL, just ride the Jeep that has KATIPUNAN sign.


(2) Alliance Française de Manille

Add: 209 Nicanor Garcia Street, Bel-Air II, Makati City, Philippines

Good to know: http://www.alliance.ph/language.php

Commuting:

– This is the easiest way I know.

– Coming from EDSA

– Take the MRT or Bus and get off BUENDIA station.

(Walk towards MCDO/Shell Gasoline station, during the morning theirs usually a line for the jeep. Ride the Jeep that has a sign “Gil Puyat LRT, Washington,RCBC” or simply ask the barker for Mapua Bound Jeep.)

– Descend at MAPUA

(Fair is Php 8.50, unless they increase. You would know if you have to get off the jeep, you’ll see or passby BPI/PS Bank, red Bank and at the corner is a big tree and musical instrument store (the last time I went their, last week the display was a huge Bass) behind it is Starbucks, across is MAPUA and SM Jazz Mall. Coming from Buendia you DON’T have to cross the street, just walk towards Jazz Mall (Across is BDO), past BDO continue walking straight, don’t look back . LOL, See Picture # 3 , you’ll know your in the right direction if you see picture #4-7)

– After 2-3 minutes walk (I’m a fast walker) you’ll see Caruso Italian Restaurant across it, is the Alliance Française de Manille and next to it is a Kindergarten School. See picture #8-9.

– The building is Gray and Red.

– Coming from Monumento/Manila ride the LRT/Jeep get off Gil Puyat and ride another Jeep that’s bound to “Buendia”, get off Mapua and walk towards SM Jazz Mall.


*I hope this post helps. I had a hard time finding ways on how to get to Alliance and I tried a lot of different ways. But like I said, this is the easiest and cheapest way. I attached a Grade 1 map/direction/instruction/pictures.

*UP map, no copyright intended.

DSC_0501DSC_0502DSC_0013DSC_0012DSC_0011DSC_0010DSC_0008DSC_0006DSC_0004

Alliance Française de Manille UP Diliman Jeep